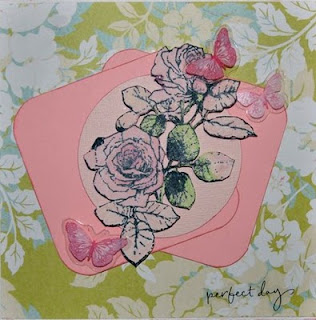
So here we are with another tutorial - I do hope these are helpful to you - I know I have a lot of fun doing them!!
Before I start I must pay homage to Sharon - this was something she did on one of her classes and I fell in love with it - so all credit to her xx
The first one is simply using your nestabilities to cut a shape from an already pre-scored card. This enables you to mat and layer on your card using the smaller sizes of the nestabilities shape you have chosen.
Please scroll down to the very bottom of this post as an Easel Card version follows these instructions .... and you don't want to miss that do you!!
So ... first of all gather together your "tools" you will need
A die cutting machine, low tack tape, nestabilites shapes, pre-scored cards, a bone folder and some double sided tape. For this particular card I used "curved rectangles" (Click Here for stock availability) and so I needed a 7x5 pre-scored card.
Place your nestabilites shape you have chosen cutting edge downwards onto the folded card leaving a small gap to the fold so that the whole shape isn't cut and secure with low tack tape
Turn your card the other way up so that the nestabilities shape is underneath the card with cutting side now facing up and cut - (if you are using a Cuttlebug the order is A Plate, C Plate, nestabilities face upwards with card face downwards then B Plate)
run through once and then run back again towards you (giving it a double cut) - with some die cutting machines the pressure on the roller can be slightly uneven - and mine is no exception - as you can see it has cut deeper to the right than the left
-
this is easily remedied by simply turning the plate around and running it through again.
You now have your shaped nestabilities card
Next gather together what you want to use to decorate and finish your card
I have chosen some die cut decoupage, complimentary blue card, adhesive pearls, ribbon, stickles and flowers
I have cut the next two smaller sizes down in the blue card
I have then cut a small amount off of the left hand side to make it straight - this is necessary so that when you mat and layer your card the straight edge will line up against the fold of your card
Now just finish off your card with the embellishments you have chosen
Now ..... to take it one step further and make an easel card you follow the same principle
Place your chosen nestabilities shape face down on your pre-scored card and secure with low tack tape - in this instance I have used Scallop Circles (Click Here for stock availability), and cut, using the same procedure as before You will also need to cut an extra single scallop circle
You will then need to fold back the lower scallop on itself 
So it now looks like this - this is the support for the "easel"
On the single scallop apply double sided tape to the BACK OF THE LOWER HALF of the shape - you are going to stick this to the folded over scallop
This forms the basis of your card - all you need to do now is decorate and finish it with your chosen embellishments
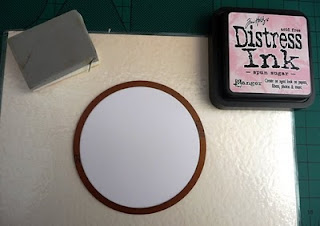
I left the white card inside the circle and distressed the inner with Spun Sugar Distress Ink (one of the new colours) Click Here for stock availability with some cut n dry foam this gives you a white "rim"
I then stamped a butterfly from "gem stone insects" a clear stamp set from Inkadinkado click here for stock availability again with Spun Sugar Distress Ink, and cut another circle from pink spot card - so I now have three circles, one of the pink spotty ones I have trimmed an edge to leave it straight - this is so it will fit inside the card easier.
I then mounted the butterfly image onto the top of the card
To make the "stopper" for the easel I decided to stamp a greeting and cut it out using the smaller circle and scallop circle nestabilities and using the same technique as before inking the circle to leave a white rim.
I then decorated the greeting and the butterfly with silver sequins
And here is the finished card!!
Thank for for staying with me through this "long" tutorial but I have tried to be as precise as possible with lots of pictures so that you can see step by step how to achieve this lovely cards - I hope you have a go as they really are easy once you get the hang of them. If you do make some, post them on your blog and leave me a link in the comments and I will pop across and have a look - I would love to see what you do.
If you live nearby pop your finished cards into the shop so we can all see what you've done.
I'm going to have a rest now!!!
Lots of Love and see you soon :o) xx


